



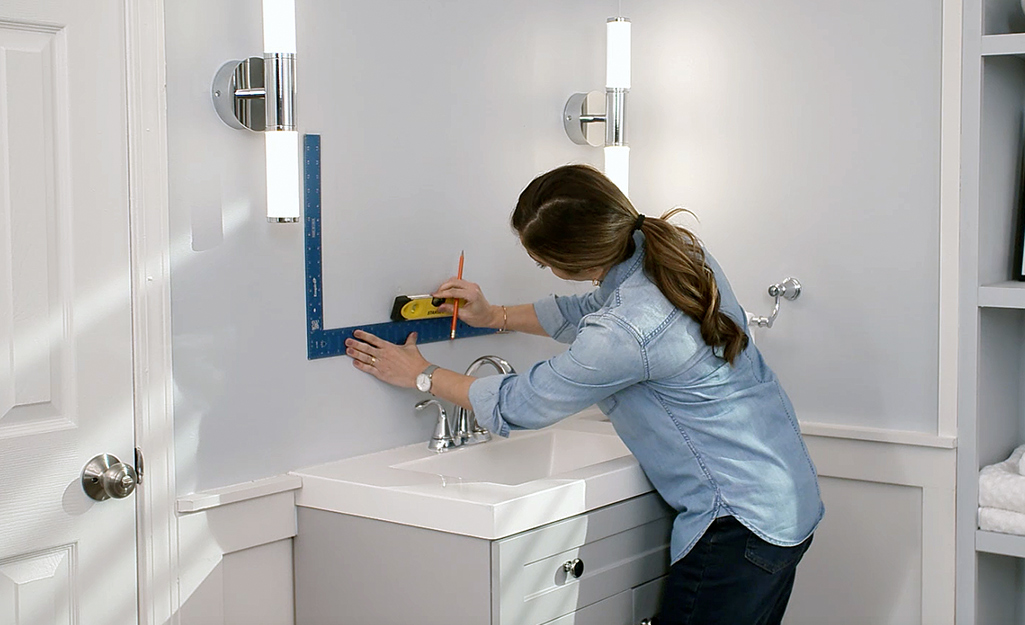
A recessed medicine cabinet is an excellent way to add storage while maintaining a clean, built-in appearance in your bathroom. Unlike surface-mounted cabinets that extend from the wall, recessed models fit inside the wall cavity, creating a sleek and space-saving design.
While installing a recessed medicine cabinet is more involved than mounting a standard cabinet, careful planning and the right tools can help ensure a successful installation. This guide walks you through the installation process, important preparation steps, and common mistakes to avoid.
Why Choose a Recessed Medicine Cabinet?
Before discussing installation, it’s helpful to understand why homeowners prefer recessed models.
Benefits include:
- Flush, built-in appearance
- More usable space around the vanity
- Reduced visual clutter
- Hidden storage
- Modern, high-end aesthetic
Many recessed medicine cabinets also include premium features such as:
- Adjustable shelves
- LED lighting
- Anti-fog mirrors
- Soft-close hinges
- Interior mirrors
- USB charging ports
- Built-in electrical outlets
These features make recessed cabinets both stylish and highly functional.
Step 1: Choose the Right Location
The first step is selecting the ideal position for your cabinet.
Most recessed medicine cabinets are installed:
- Above the bathroom vanity
- Centered over the sink
- At a comfortable viewing height
When choosing the location, make sure there is enough space between:
- The faucet
- Vanity lighting
- Ceiling
- Adjacent walls
Many installation guides recommend placing the top of the cabinet around 72 inches from the floor, while adjusting for the height of the users and the cabinet dimensions.
Step 2: Check What’s Behind the Wall
This is one of the most important parts of the project.
Before cutting into the drywall, verify that the wall cavity is free from:
- Plumbing pipes
- Electrical wiring
- HVAC ducts
- Structural framing obstacles
Use a stud finder to locate wall studs and determine whether the cabinet will fit between them.
If you discover plumbing or electrical lines that cannot easily be relocated, a surface-mounted cabinet may be the better option.
Step 3: Gather Your Tools
Although tools vary slightly depending on the cabinet model, you’ll typically need:
- Tape measure
- Pencil
- Level
- Stud finder
- Utility knife
- Drywall saw or oscillating multi-tool
- Drill and driver
- Wood screws
- Wood blocking (2×4 lumber if needed)
- Shims
- Safety glasses
- Dust mask
Always review the manufacturer’s installation instructions before beginning, as dimensions and mounting requirements vary by model.
Step 4: Measure and Mark the Opening
Accurate measurements are essential.
Use the rough opening dimensions provided by the manufacturer—not just the outside dimensions of the cabinet.
Then:
- Find the center of your vanity.
- Mark the cabinet outline on the wall.
- Use a level to ensure perfectly straight lines.
Double-check all measurements before making any cuts.
Step 5: Cut the Drywall
Once you’ve confirmed there are no hidden obstructions, carefully cut along the marked outline.
Most installers:
- Score the outline with a utility knife.
- Cut the drywall using a drywall saw or oscillating tool.
- Remove the drywall section.
- Clean away loose debris.
Take your time to create a neat opening, as oversized cuts may require drywall repairs later.
Step 6: Frame the Opening
If the cabinet fits neatly between two studs, only horizontal wood blocking may be needed.
If not, additional framing may be required to support the cabinet securely.
Typical framing involves:
- Installing horizontal blocking
- Securing the framing with screws
- Checking that the opening is square
- Confirming the cabinet fits properly
The framing provides solid support and helps keep the cabinet stable over time.
Step 7: Test Fit the Cabinet
Before permanently securing the cabinet, slide it into the opening to verify:
- Proper fit
- Correct depth
- Level positioning
- Flush alignment with the finished wall
If necessary, use wood shims to make small adjustments before fastening the cabinet.
Step 8: Secure the Cabinet
Once everything fits correctly:
- Position the cabinet inside the framed opening.
- Check that it’s level.
- Fasten it using the mounting screws supplied by the manufacturer.
- Tighten all fasteners evenly.
Avoid overtightening, as this may damage the cabinet frame.
Step 9: Finish the Installation
After securing the cabinet:
- Install adjustable shelves.
- Attach the mirrored door if required.
- Test soft-close hinges.
- Check door alignment.
- Install any interior accessories.
If small gaps remain around the cabinet trim, use paintable caulk where recommended by the manufacturer for a clean, finished appearance.
Installing an LED Recessed Medicine Cabinet
If your cabinet includes:
- LED lighting
- Interior outlets
- USB charging ports
- Anti-fog technology
You’ll also need an electrical connection.
Because this involves household wiring, many manufacturers recommend professional installation by a qualified electrician, especially if new wiring must be added or relocated.
Common Installation Mistakes to Avoid
Avoid these common errors:
- Skipping wall inspection before cutting
- Measuring the cabinet instead of the rough opening dimensions
- Cutting an oversized opening
- Ignoring stud locations
- Forgetting to check cabinet depth
- Failing to level the cabinet
- Overtightening mounting screws
Careful planning helps prevent costly repairs and ensures a professional-looking installation.
Can You Install It Yourself?
Many experienced DIY homeowners can install a recessed medicine cabinet successfully if:
- The wall cavity is unobstructed.
- No plumbing or wiring needs to be moved.
- The cabinet fits between existing studs.
However, professional installation is recommended when:
- Structural framing must be modified.
- Plumbing is present.
- Electrical work is required.
- The wall is load-bearing.
- You’re unsure about cutting into the wall.
Professional installation helps ensure the cabinet is installed safely, securely, and in compliance with local building codes.
Maintenance After Installation
Once installed, maintaining your recessed medicine cabinet is simple.
Regularly:
- Clean the mirror with a non-abrasive glass cleaner.
- Wipe interior shelves.
- Tighten loose hardware if needed.
- Inspect hinges periodically.
- Remove expired medications and unused products.
Routine maintenance keeps your cabinet looking and functioning like new.
Conclusion
Installing a recessed medicine cabinet is an excellent way to upgrade your bathroom with stylish, built-in storage that saves space and enhances organization. Although the installation process requires careful planning, accurate measurements, and attention to wall construction, the finished result offers a clean, modern appearance that can significantly improve both the functionality and value of your bathroom.
If you’re looking for premium recessed medicine cabinets designed for durability, elegant style, and everyday convenience, AllSumHome offers a wide selection to fit various bathroom layouts and décor styles. Whether you’re renovating a small guest bathroom or creating a luxurious primary suite, AllSumHome has recessed medicine cabinet solutions that combine practical storage with sophisticated design.
